This article will explain how to publish a report to the Vantage Ultimate Web Module, and the various options and permission settings available.
When you publish a report to the Web Module, Vantage generates the report as part of the publish process. Stand alone reports that you have previously generated cannot be retrospectively published to the web module.
To publish a report to the web module:
- Go to the Web Module tab in Vantage, and click Publish Report on the left in the Content box
- On the Template page of the Publish Report dialog select the report template that you would like to use for the report
- On the Storage page of the Publish Report dialog select the storage(s) that you would like to use for the report
- On the Publish page of the Publish Report dialog, give your report a title, and select the Web Module that you would like to publish the report to. You can also choose to make the report available for Collation, and enter a tag to associate with this report.
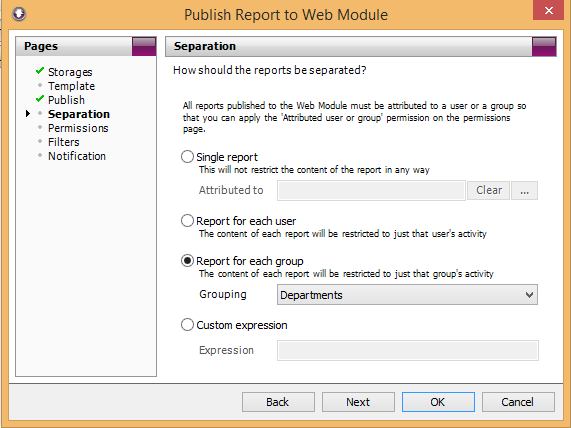
- On the Separation page of the Publish Report dialog you can choose how you would like the data in your storage to be split up for the report(s).
You can either publish a:
(a) Single report: this means the report will contain all of the data in your storage. You can choose to make this report attributed to a particular user or group for Permission settings.
(b) Report for each user: this will create a separate report for each user in your Organization, containing only that user’s data.
(c) Report for each group: this will create a separate report for each group in your Organization, for the grouping level you have selected from the dropdown list, containing only that group’s data.
(d) Custom expression: this option allows you to create a separate report for each item that matches a specific custom expression. This is an advanced option that may be suggested by WebSpy Support for some specific custom reporting requirements.
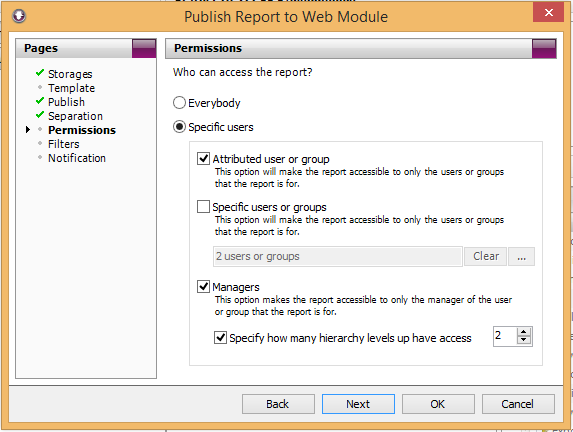
6. On the Permissions page of the Publish Report dialog you can choose who has access to the report(s).
You can select to make the report(s) available for:
(a) Everybody; or
(b) Specific users, where you can select one or more of the following:
- Attributed user or group:
This means the report(s) will be accessible only to the user or group that the report is about, ie the user or group who’s data is contained in the report - Specific users or groups:
This option allows you to make the report(s) accessible to any specific user or group, for example IT Admin staff, or the CEO - Managers:
If you have imported the ‘manager’ attribute in your Organization section, this option allows you to make the report(s) accessible to the manager of the user or group that the report is about, ie the user or group who’s data is contained in the report. You can also select how many hierarchy levels up may have access to the report(s)
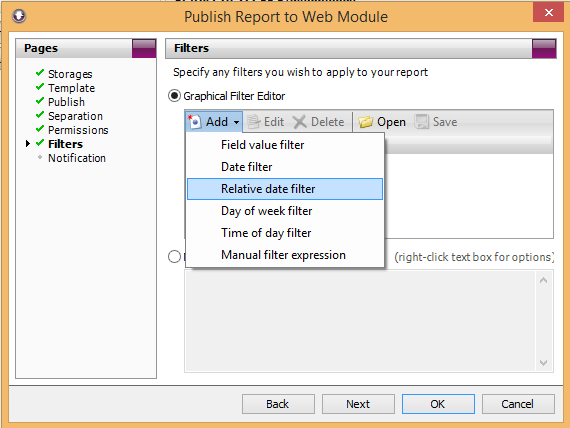
7. On the Filters page of the Publish Report dialog you can apply any required filters to your report. See our support article or our video blog for more information on filters.
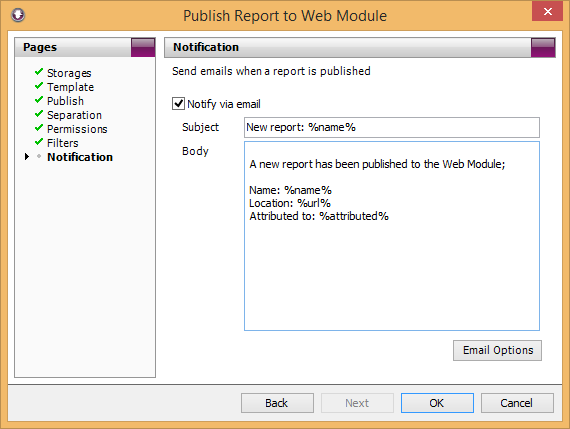
8. On the Notification page of the Publish Report dialog you can select to send emails to the users who have had a report published for them. This will be sent to the email address specified for the user in your Organization section.
The default email subject contains the name of the report, and the email body contains the report name, a URL link to the report, and the user or group who the report is attributed to. You can modify the subject and/or body of the email if you like.
You can also click the Email Options button to ensure your mail settings are correctly set up. If you have any problems with the emails being sent, please check out our support article on this topic for some possible resolutions.
Publishing a report to the Web Module can also be set up to happen automatically at scheduled times using the Tasks section of Vantage.


Leave A Comment