
Update: The technique described in this series of blog articles has since been improved upon, and integrated into WebSpy Vantage 3.0 via the Origin Domain summary that is present in when analyzing any log files that contain URLs. We’ve called this feature Site Clean. It is also available in our separate Fastvue Reporter applications. See further details about our unique Site Clean engine.
In part one of this series we learned about the challenges the modern web has created for employee Internet reports. In part two, we came up with a theoretical solution to most of these challenges using Referrer URL and Mime Types. In this third part of the series, we’ll see how to employ Custom Expressions in WebSpy Vantage to implement the solution.
Using WebSpy Vantage to Create a Sensible Sites Report
A key factor of being able to implement a sensible sites report is to be reporting on a log file format that contains our three essential fields:
- URL (the original requesting URL)
- Referrer URL
- Mime Type
Supported Log Formats
Here are the formats WebSpy Vantage supports that log URL, Referrer URL and Mime Type, either by default, or by customizing the logging options:
- BlueCoat W3C Format
- Cisco IronPort (Now Cisco Web Security Appliance)
- NetCache W3C
- Microsoft ISA Server (2004 & 2006)
- Microsoft Forefront Threat Management Gateway (TMG) Web Proxy Logs
- Web Washer Access Logs
- Sophos WSA
It is important to note that the names of these essential fields can vary between formats. For example, Mime Type is often referred to as Content Type.
I’ll be using Microsoft Forefront Threat Management Gateway for the rest of my examples in this article.
Custom Expressions
If you are analyzing one of the above formats, then you can utilize Custom Expressions in Vantage to define a node in a report template to display what we want.
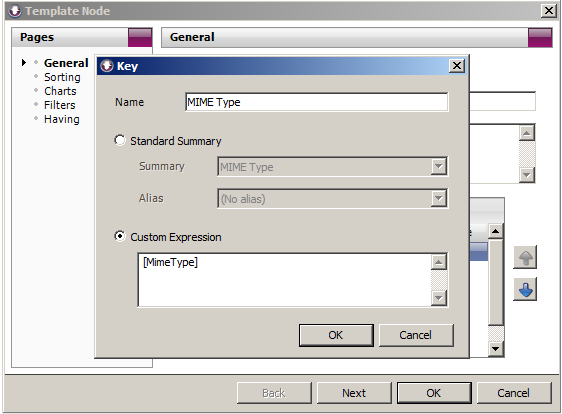
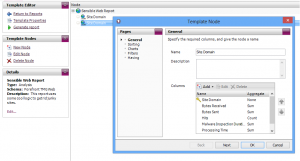
Every Summary in WebSpy Vantage has an underlying expression. Usually the expression simply pulls out a certain field from your logs, and other times it applies a function to a field. You can find the expression for any summary when adding a node to a report template:
- Double-click a node in a report template
- On the General page, double-click the key column
- Select the Summary you are interested in.
- Click the Custom Expression radio button to view its Custom Expression.
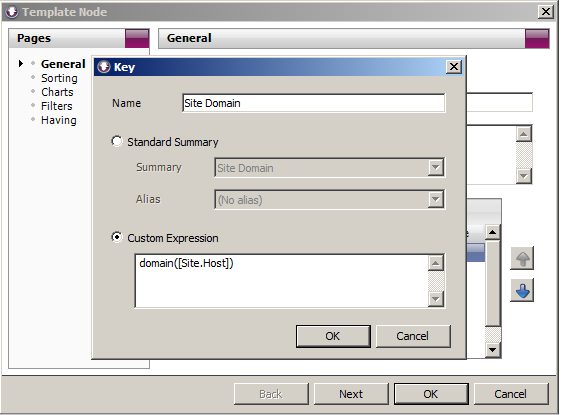
For example, the custom expression for the Mime Type Summary in the Forefront TMG web proxy format is [MimeType]. This is simply pulling the MimeType field from the logs. Yet the custom expression for Site Domain is domain([Site.Host]), which is applying the domain() function to the Host portion of the Site field.
The great thing about Custom Expressions is they support if statements to define a new Summary for our idea above. For Forefront TMG Web Proxy logs, this custom expression looks like:
iif([MimeType] = "text/plain" || [MimeType] = "text/html" || [MimeType] = "text/html;charset=utf-8" || [MimeType] = "text/html; charset=iso-8859-1", domain([Site.Host]), domain([Referrer.Host]))
In other words, for the Mime Types text/html or text/plain or text/html;charset=utf-8 or text/html; charset=iso-8859-1, display the normal site domain, otherwise display the referrer domain. And yes, there is a ‘double i’ in iif – it is not a typo (it stands for Inline if).
Create the Report Template
Let’s start fresh and create a new report with this information:
- Go to the Reports tab
- Click New Report Template
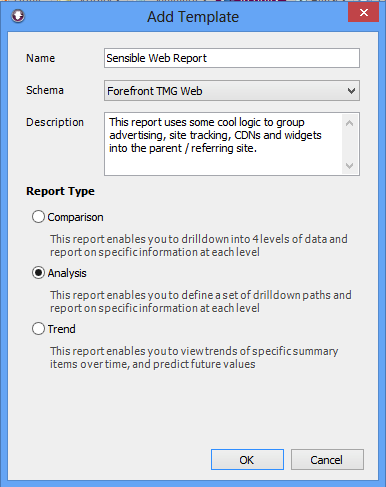
- Name the report Sensible Web Report
- I’m going to select the Forefront TMG Web Schema for my Template. You can use the schemas for the log formats mentioned above, but the field names in the custom expressions that follow may be slightly different.
- Ensure Analysis Report is selected and click OK.
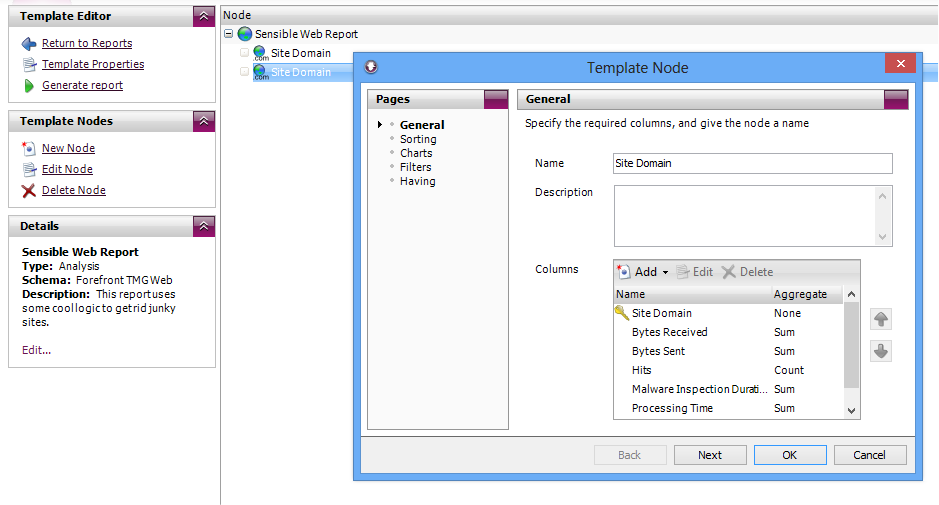
Now that we have our Template, lets start by adding a normal Site Domain node.
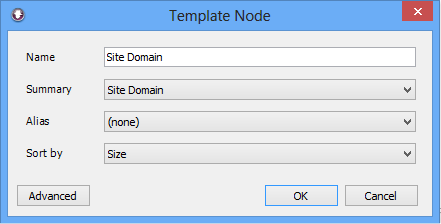
- Right-click the ‘Sensible Web Report’ node and click New Node.
- Select Site Domain in the Summary field and Sort By Size and click OK.
Now, lets do this again to add a second Site Domain node that is exactly the same, only we’ll edit this second node to include our ‘Sensible Sites’ logic.
- Right-click the top level Sensible Web Report node and click New Node.
- Select Site Domain in the Summary field and Sort By Size and click OK.
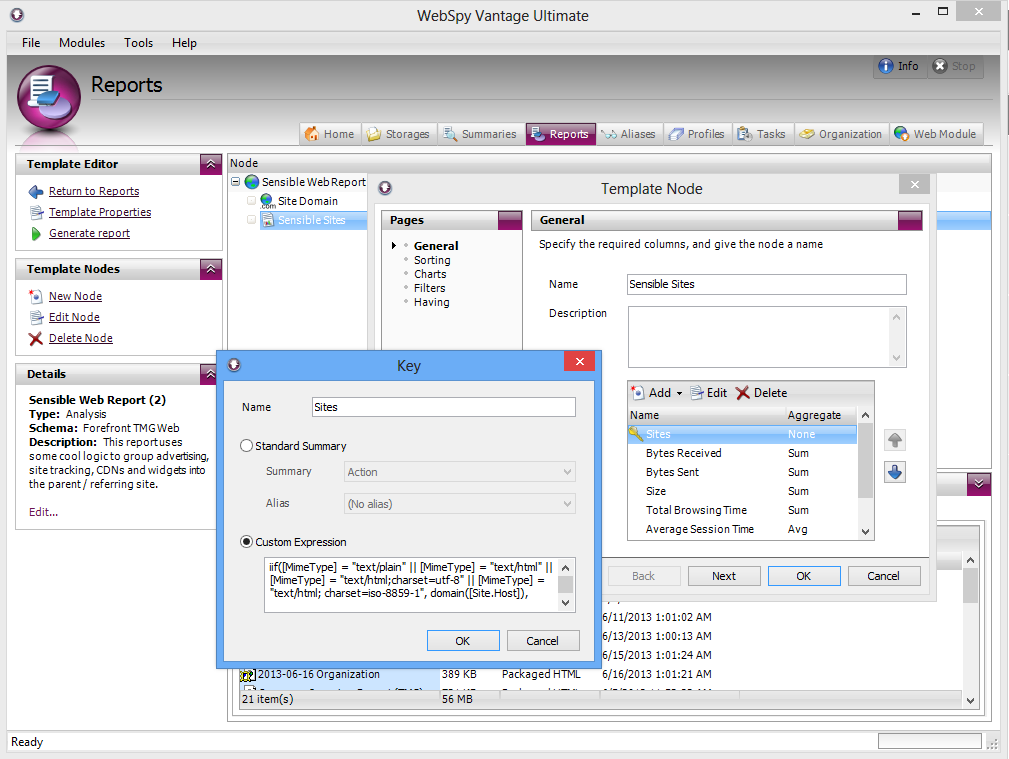
- Double-click the second Site Domain Node to edit it.
- Rename the Node to Sensible Sites
- In the columns section, double-click the Site Domain key column
- Click the Custom Expression radio button and enter:
iif([MimeType] = "text/plain" || [MimeType] = "text/html" || [MimeType] = "text/html;charset=utf-8" || [MimeType] = "text/html; charset=iso-8859-1", domain([Site.Host]), domain([Referrer.Host]))
- Click OK to add the edited column.
- Click OK on the Template Node dialog
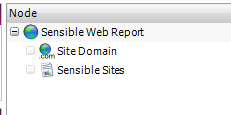
You should now have a report template with two nodes. One showing regular old Site Domains and one showing Sensible Sites using our new Custom Expression.
Run the Report
Now for the fun part. Run the new Report Template on your storage and check out the results!
Click Run Report and proceed through the Report wizard selecting your storage and report format (I recommend Web Document) . Ensure there are no filters other than a sensible date filter on the Filters tab (Tip: create a test storage with a small amount of data for testing reports).
Your report will show two sections. Site Domain and Sensible Sites. Click on the Site Domain summary to see the regular list of sites.

Now click on the Sensible Sites section.
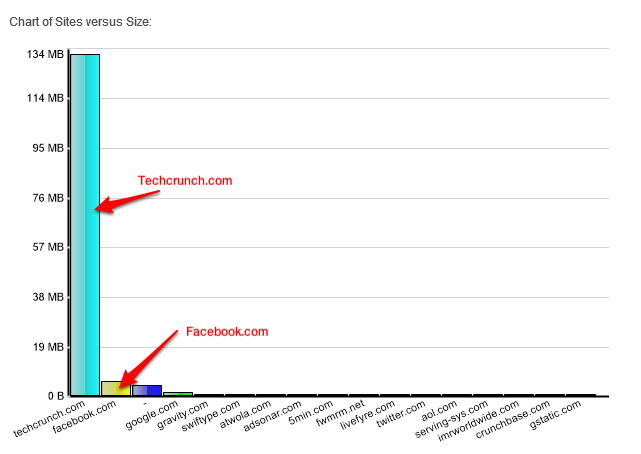
Huzzah! The Sensible Sites section resembles reality much more closely. Awesome
Techcrunch.com is my top site by size, which is where I watched the video (originally shown as 5min.com), and my second site is facebook.com. This accurately reflects my browsing behavior.
Also the following sites have completely disappeared:
- microsoft.com
- wordpress.com
- google-analytics.com
- fbcdn.net
- akamaihd.net
- linkedin.com
- …
All these sites were serving content that was considered a ‘web resource’ (not text/html or text/plain), and therefore the report is displaying the Referrer Domain instead, which in my case is likely to be techcrunch.com or facebook.com.
However, it is not perfect. Notice the third site above is blank (represented by a -) and there are still weird sites in the long tail including gravity.com, adsonar.com, 5min.com, livefyre.com, imrworldwide.com and gstatic.com.
Continue reading part four of this series to see how to tweak the Custom Expression even further.
See also:
- Making Sensible Employee Internet Reports for the Modern Web (Part 4)
- Making Sensible Employee Internet Reports for the Modern Web (Part 5)
- Making Sensible Employee Internet Reports for the Modern Web (Part 2)
- How to Create Anonymous Internet Reports in Vantage
- How to Report on Custom Logged Data by adding a Custom Field Node