
Using WebSpy Vantage to analyze and report across your Palo Alto Firewall deployment is a great way to keep on top of web usage throughout your organization.
This guide will take you through the process of configuring Palo Alto Firewalls and WebSpy Vantage to produce accurate and meaningful web activity reports that can be utilized by HR (Human Resources), Department Managers, IT and even end-users themselves.
These reports provide visibility into employee Internet usage with the aim of increasing online productivity, and ensuring your Palo Alto Firewall policies are working effectively.
Types of Palo Alto Firewall Log Files
Palo Alto Firewalls produce two main types of log files. Traffic logs and Threat logs. The Threat logs contain information about websites visited (URLs), and the Traffic logs contain information about bandwidth and connections.
Both logs can be imported and analyzed with WebSpy Vantage, but be aware of the following limitations in each log format:
Palo Alto Traffic Logs:
Palo Alto Traffic logs do not contain URLs, so they cannot be used to find the web pages visited by your users. However, they do contain bytes sent and received, as well as the Applications used and Categories of web traffic.
Traffic logs are therefore useful for analyzing the bandwidth of common web applications such as YouTube and Facebook. However, for everything else under the ‘web browsing’ application, visibility is limited to just the category of website.
Palo Alto Threat Logs:
Threat logs on the other hand do contain URLs, but they do not contain size information. You can therefore analyze the length of time a particular site was actively accessed for (called ‘Browsing Time’ in WebSpy Vantage), but not how much data was downloaded from or uploaded to the website.
Threat logs contain all web activity that Palo Alto Firewall is set to Block or Alert (or any action other than None).
Configure Logging on Palo Alto Firewalls
To configure Palo Alto Firewall to log the best information for Web Activity reporting:
- Go to Objects | URL Filtering and either edit your existing URL Filtering Profile or configure a new one.
- Ensure all categories are set to either Block or Alert (or any action other than none). This will ensure that web activity is logged for all Categories.
- Enable HTTP Header Logging. To do this, go to Objects | Security Profiles | Settings and enable User-Agent, Referer, and X-Forwaded-For checkboxes under HTTP Header. For more details, see How to Enable HTTP Header Logging and Track URLs Accessed by Users.
Accessing Log Files on Palo Alto Firewalls
There are two methods of obtaining log files from Palo Alto Firewalls:
- Export to CSV from the Monitor tab, or
- Syslog
Exporting Palo Alto Firewall Logs to CSV
If you simply want to test WebSpy Vantage with your Palo Alto Firewall without setting up a syslog server, then go to the Monitor tab and export your Threat or Traffic logs to CSV. These CSV files can then be imported into WebSpy Vantage. Once you’re satisfied with the reports, you can configure syslog as a better long-term option.
Exporting logs to Syslog on Palo Alto Firewall
Syslog is the best option for automated logging and reporting for the following reasons.
Advantages of Syslog
- You do not need to manually download logs each day from the Palo Alto Firewall. They are automatically created on the destination syslog server.
- If you use a syslog server that automatically rolls over the logs each day, then it is simple to automate the import of those logs into WebSpy Vantage each day.
- Log data is stored off-box and can be archived appropriately.
Setting up a Syslog Server
WebSpy Vantage is not a syslog server and does not directly collect syslog messages for you. WebSpy Vantage imports the text logs created by a syslog server, such as Fastvue Syslog.
Configure Palo Alto to send Syslog messages to your Syslog server
There are three basic steps to configuring Palo Alto Firewalls to send syslog messages to your syslog server:
- Create a Syslog Server Profile in Device | Server Profiles | Syslog
- Configure a Log Forwarding Profile for both the Threat and Traffic logs in to Objects | Log forwarding
- Use the log forwarding profile in each security rule that you want to log traffic for. Edit the security rules in Policies | Security Rule, then go to Actions | Log forwarding.
For more information on each of these steps, see the Palo Alto Networks documentation here:
- Threat Logs: How to Forward Threat Logs to Syslog Server
- Traffic Logs: How to Forward Traffic Logs to Syslog Server
Once syslog is correctly configured, your syslog server should generate text log files that can be imported into WebSpy Vantage.
Getting Started with WebSpy Vantage Ultimate and Palo Alto Firewalls
If you haven’t already downloaded the fully featured 30 day of Vantage Ultimate, go ahead and do so. The installation and getting started information is shown after downloading.
You can then proceed with importing log files, analyzing data, creating report templates and aliases, and automating your reporting process using Tasks. Here is a video that guides you through the main process of reporting on Palo Alto Firewall log files.
Importing Log files into WebSpy Vantage
Now that you have configured Palo Alto Firewall’s logging, and have access to either the exported CSV files, or the syslog text files, you can import these logs into WebSpy Vantage and begin analyzing and reporting on the log data.
Before you begin, be aware that your WebSpy Vantage storage will consume disk space as it holds roughly 80% or the original Palo Alto log file data. Check that your storages are being created in a location with enough disk space to allow for this. You can change the location in Tools | Options | Paths | Storages.
To import your Palo Alto Firewall Log files into WebSpy Vantage:
- Open WebSpy Vantage and go to the Storages tab
- Click Import Logs to open the Import Wizard
- Create a new storage and call it Palo Alto Firewall, or anything else meaningful to you. Click Next.
- Select Local or Networked Files or Folders and click Next.
- Select the Palo Alto Networks loader and click Next.
- Click Add | Folder and select the folder where your Palo Alto Firewall’s log files are stored.
- Ignore the last three pages of the Import Wizard and click OK to begin the import process.

Your log files will start importing into your WebSpy Vantage Storage, and you can use this storage for Analysis and Reporting from this point on. You can even delete the original log file data once it has been imported.
Automating Imports:
Now that you have created a storage that is pointing to your Palo Alto Firewall’s log data, it is a good idea to automate the process of importing new logs each night. To do this:
- In WebSpy Vantage, go to the Tasks tab and click New Task.
- Call the Task Daily Task and proceed through the short wizard to create a task with a Daily schedule running at 1am in the morning.
- Once the Task has been added, select the next task and click Add Action | Import new hits to existing storage
- Select the Storage you created above and ensure Resume import from last position is selected. Click OK to add the action.
WebSpy Vantage will now automatically import logs new log files each night at 1am. As this storage will grow until you run out of disk space, it is a good idea to add a data retention policy using the Purge data from storage task action. To do this:
- Still on the Tasks tab, select the Task you created above and click Add Action | Purge Data from Storage
- Select your Palo Alto Firewall storage and click Next
- Select your desired data retention, such as Purge data older than 3 months. Remember that the WebSpy Vantage storage will consume about 80% of the size of your Palo Alto Firewall logs.
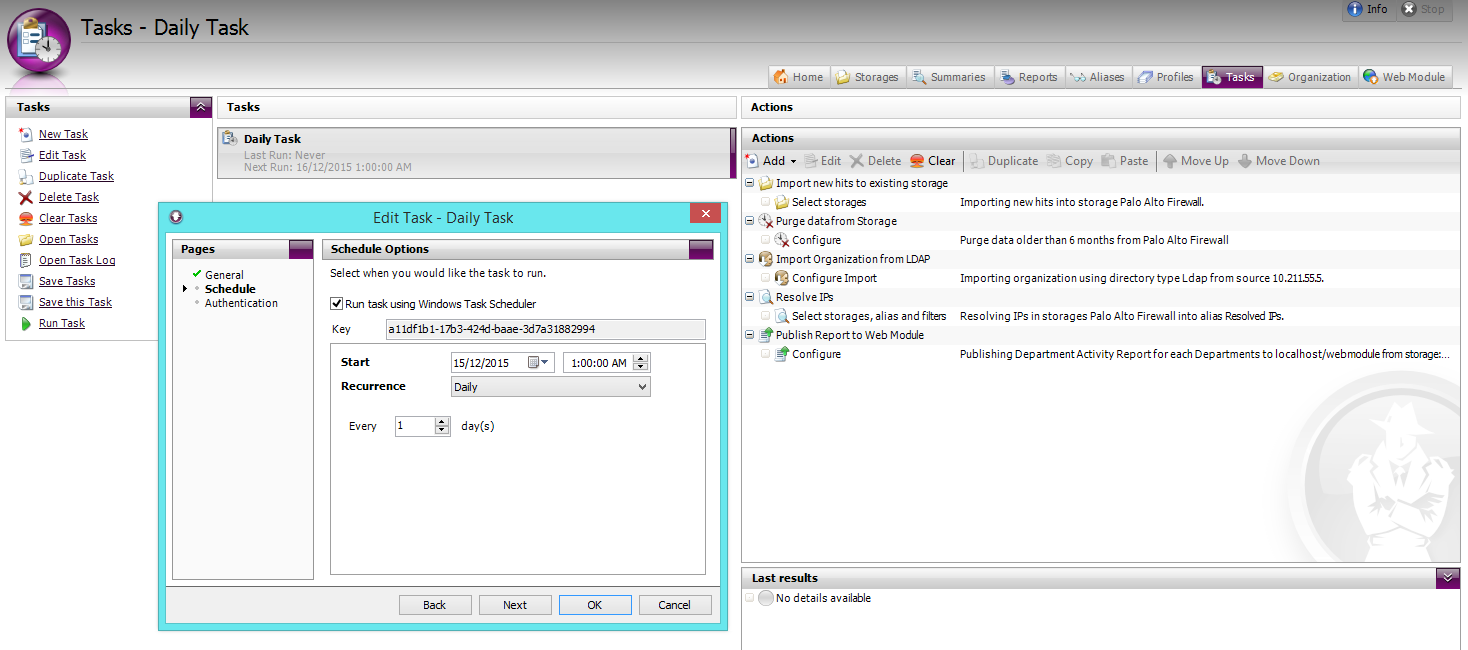
WebSpy Vantage will now automatically purge data from your storage once it has imported new logs files.
Analyzing Palo Alto Firewall Log Files
Now that you have a Storage that contains your Palo Alto Log files, you can use this storage for analysis and reporting. A good idea is to start with an Ad-hoc analysis to see how WebSpy Vantage is importing your log data into its various ‘Summaries’, as these summaries are the building blocks for your Report content, as well as the fields you can use when filtering reports.
To run an ad-hoc analysis:
- Go to the Summaries tab and click New Analysis
- Select your Palo Alto Firewall storage and click Next
- Ensure Ad-hoc analysis is selected along with ‘Use pre-calculated analysis if available’. WebSpy Vantage runs an analysis as you import data into a storage, then saves this ‘pre-calculated’ analysis back into the storage. The ‘Use pre-calculated analysis’ option simply pulls this analysis out of the storage so you don’t need to wait for a full analysis to complete.
- Click OK to view the Analysis.
Viewing the Analysis:
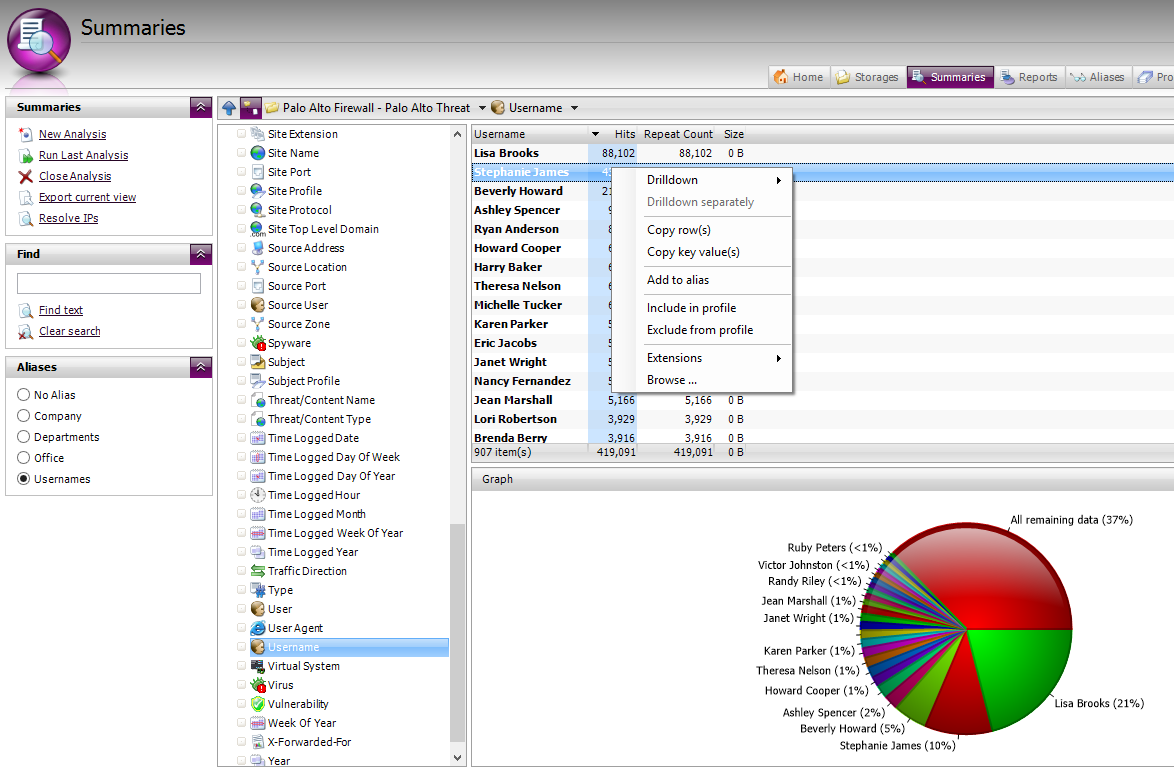
- Once the Analysis completes, you will notice a range of fields or Summaries down the left hand side such as Actions, Categories, Origin Domain, and Usernames. Most of these are self explanatory. Select the Summary to view its data.
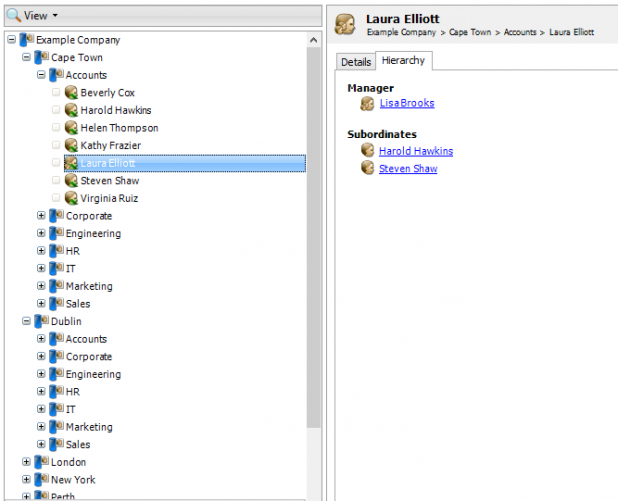
- You can right-click anything you see and drilldown into its data. For example, Right-click a Username and drill down to Origin Domain to view the sites visited by the user.
- Once you have drilled down, you can switch to any other Summary at that drilldown level to view other information, such as the Categories, Dates and Hours accessed by a user.
Note: Drilling down in to data can take a little while, especially with large data sets. It is a good idea to create a small ‘Test’ storage that contains a small sample of your Palo Alto Log files, and use the Summaries tab to view and drilldown into this data. This makes it easier to view the type of information in each Summary in order to build and test your custom report templates (see below).
Reporting on Palo Alto Firewall Log Files
Using the Summaries tab to dynamically drilldown into data is great, but you’ll soon find yourself wanting to send pre-formatted information about web activity to specific people in your organization, or perhaps send automated reports to yourself on a daily or weekly basis.
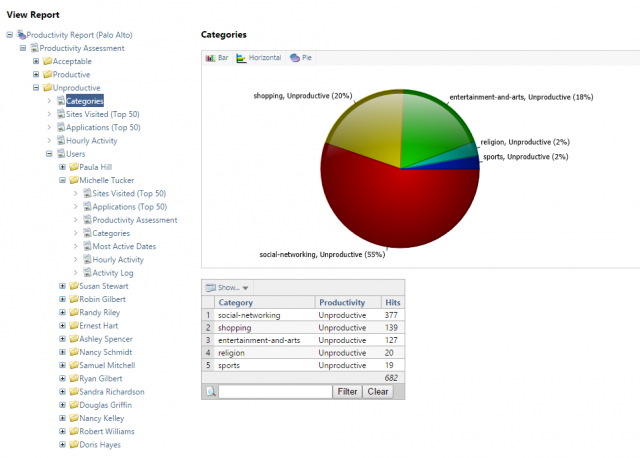
You’ll probably also want to make some adjustments to the way the log data is displayed, such as showing real user names rather than the logged user id or login name, and perhaps group these users into Departments or other types of organization groups. The following screenshot shows a report that has been configured with productivity classifications and username adjustments:
Pre-formatting information can be done using Report Templates, and making adjustments to the log data (grouping users, IP addresses etc.) can be done using Aliases.
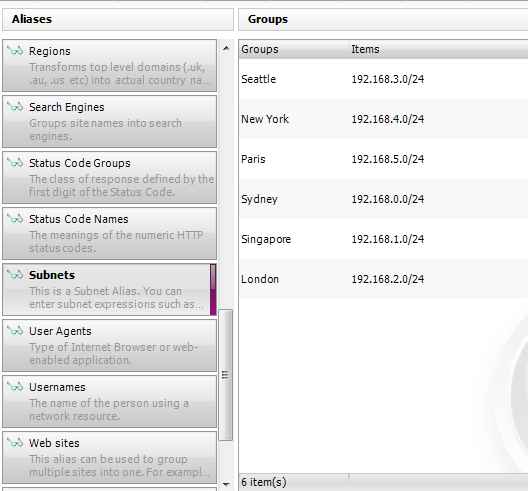
The Organization tab in WebSpy Vantage can automatically create your username and department aliases for you, by importing information from Active Directory, and other LDAP Directory servers.
Customizing your reporting process depends on your specific reporting requirements (report content, number of recipients, time schedules etc.), but here is a general recommended workflow:
- Import your Organization from LDAP
Import your Organization structure from Active Directory (or other LDAP Directory Server) using the Import Organization wizard on the Organization tab. This automatically populates the Usernames alias (shown on the Aliases tab), and creates new aliases for each Group that you specify. - Create custom Report Templates
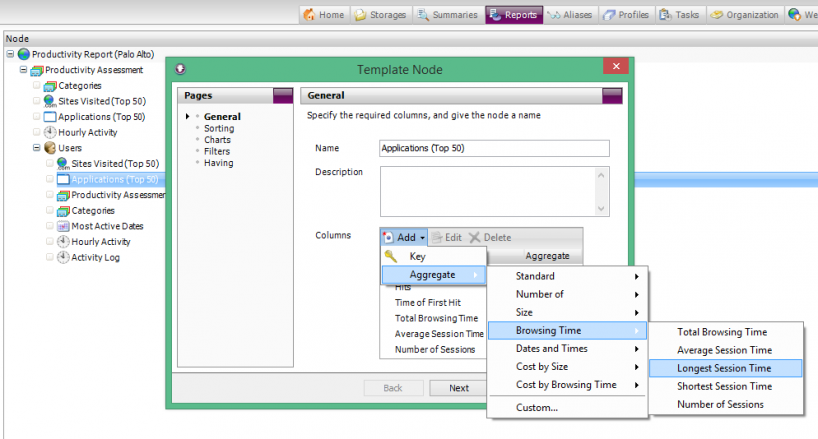
Go to the Reports tab and create a Report Template that extracts the information you want to report on, such as Top Users, Sites, Categories and so on. When adding Users to your report, select the appropriate Alias. For example, to see a list of ‘real’ usernames, select the ‘Usernames’ alias. To group users into Departments, or any other group you specified in the Import Organization wizard, select the appropriate. Vantage does come with a range of generic Web Reports, but to utilize some of the Palo Alto Firewall information (such as Categories and Actions), it is a great idea to understand how to create your own templates. - Generate Reports
As you are building a report template, you can run it on a Storage at any time by clicking Generate Report. We recommend running it on a small test storage to reduce the time it takes to output the report. When you’re happy with the report content, you can run it on your full production Storage. - Publish Reports to the Web Module
The Web Module is a separate Intranet site that houses your Vantage Reports, keeping you in control over who accesses this potentially sensitive information. Once you’re happy with the report content, you can try publishing the report to the Web Module, along with separating reports for each Group, or Manager, and assigning permissions. - Schedule the entire process using Tasks
Everything in Vantage can be automated using the Tasks tab. You’ve already seen how to automate the Import process above, and now you can add other Actions to your Task such as publishing reports to the web module, and importing new organization information from Active Directory.
Once again, a great place to start and get an idea of how it all works is by watching our video on reporting on Palo Alto Networks log files here.
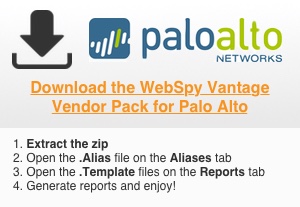
Download The Palo Alto Vendor Pack
Once again, if you haven’t already downloaded the fully featured 30 day of Vantage Ultimate, go ahead and do so. Installation and getting started information is shown after downloading.
In addition to downloading the software, we also have a Palo Alto Vendor Pack that includes a Productivity alias (groups Palo Alto’s web categories into Productive, Unproductive, Acceptable and Unacceptable), as well as a Productivity Report and a Manager Report template. This saves you some time creating your own report templates for Palo Alto log data, or at least gives you some good templates to get started with.
You can download the vendor pack here:
Let Us Help!
If you have any questions or need help getting started, please don’t hesitate to contact support. For pricing information, simply request a quote.