The Windows native firewall has been around for some time now. It first made its appearance in Windows XP as the Internet Connection Sharing Firewall, which was a basic inbound firewall. In Windows XP SP2 it was turned on by default and in Windows Vista, it had grown up to be both in and outbound capable.
Currently the firewall supports a number of key features that rival desktop firewalls available from security vendors. It supports inbound and outbound rules, it has support for various protocols and application configurations and it supports profiles for Domain, Private and Public networks. It is manageable through Group Policy, PowerShell, Netsh and the GUI.
But there is one big missing component. Like a person with really low self-esteem, it fails in telling you what it does!
By default, the Windows firewall does not log its actions. There are also no native tools to show you what it does or help you track potential issues.
This is where WebSpy Vantage can step in and help. By enabling Windows Firewall logging and using WebSpy Vantage to centrally report across all Windows Firewall logs, you can have a simple network monitoring solution up and running in moments.
This article will step through the process of first enabling and configuring logging in Windows Firewall. The second part will show you how to use Webspy Vantage to analyse and report on the logs.
Enabling and Configuring Windows Firewall Logging
As mentioned earlier, there are many ways of configuring Windows firewall. For this article, I will show you how to enable Windows Firewall logging using the Windows Firewall GUI, and PowerShell.
Method 1: Windows Firewall GUI
- Open the Advanced Firewall Management Snap-in (WF.msc)
- Select the Action | Properties from the main menu
- On the Domain Profile tab, click Customize under the Logging section.
- Increase the file maximum size.
- Turn on logging for dropped packets
- Turn on logging for successful connections
Method 2 – PowerShell
- Open a PowerShell window as Administrator and execute:
Set-NetFirewallProfile -name domain -LogMaxSizeKilobytes 10240 -LogAllowed true -LogBlocked true
By default your firewall will start logging to %systemroot%\system32\LogFiles\Firewall\pfirewall.log. You may like to change this to a central logging server.
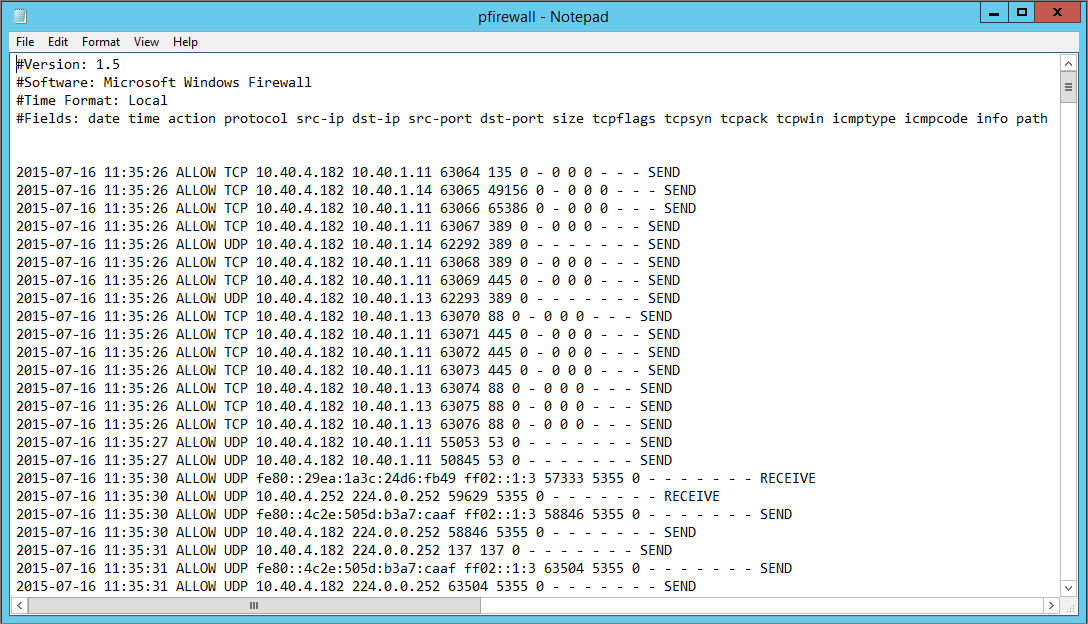
Check that the log is being populated
You can now use the robust Windows reporting solution supplied by Microsoft to make sure the log is being written to. Notepad!
Okay, it’s not that robust, but it is enough to show you that information is coming in. If you kept the default log location, navigate to “%systemroot%\system32\LogFiles\Firewall\pfirewall.log” and open the log.
You will notice that the information is quite basic, but even this level of metadata can be very valuable when used in the correct context.
Using WebSpy Vantage to Analyse Windows Firewall logs
WebSpy Vantage is a powerful log analysis and reporting framework and can be used for far more than just reporting Internet web usage. You will see below how it can enable you to make use of data that you might otherwise ignore.
Create a Storage and Import the Windows Firewall logs
- Open the WebSpy Vantage console on your server (30 Day free trial available)
- Select Storages | Import Logs
- Specify a name for your storage (such as Windows Firewall) and click Next
- For the input type choose Local or networked files or folders
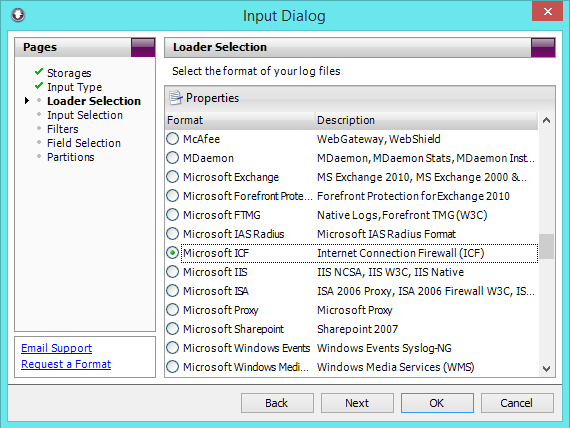
- For loader selection choose Microsoft ICF (internet Connection Firewall)
- For Input selection click Add | Folder and select your log file path (e.g. C:\WINDOWS\System32\system32\LogFiles\Firewall\)
- Click OK to start importing your logs (do not worry about the additional three ‘advanced’ pages in the wizard)
You will see your log file(s) begin to import and will be notified when it has completed. You might like to go to the Tasks tab at this stage and add a new Daily task (say for 1 am) to import new hits into existing storage automatically.
Analyzing Windows Firewall logs
Now that you have imported your Windows Firewall logs into a WebSpy Vantage storage, you can use that Storage for analysis and reporting. Even if you delete the original log files, your Storage will not be affected.
- Select the Summaries tab and click New Analysis
- Select the Windows Firewall Storage created earlier and click Next
- Select Ad-hoc analysis and click OK.
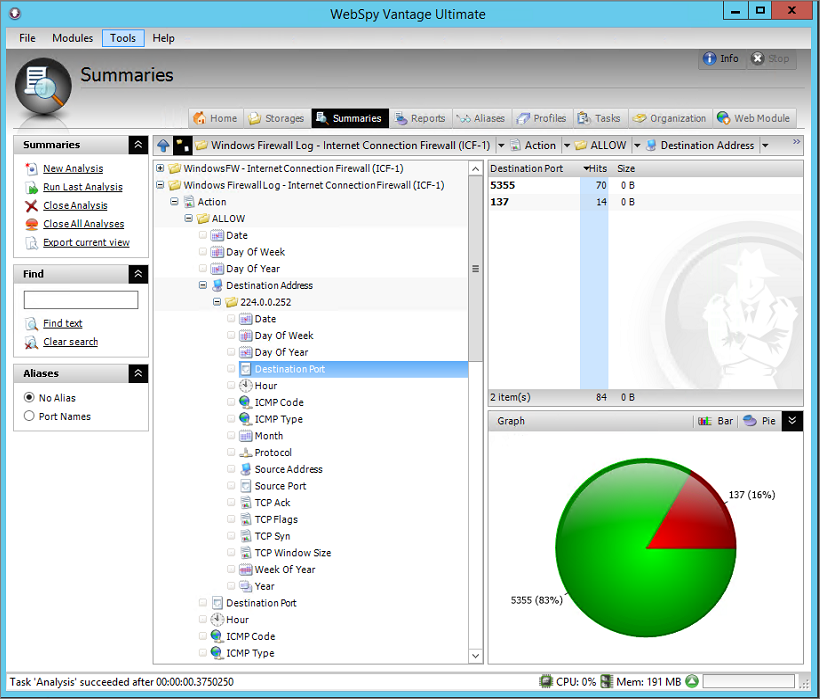
You can see that even using the very basic log data from Windows Firewall, valuable information can be manipulated using the Summaries tab. For example, the screenshot below shows how you can drilldown to investigate the Destination Ports that Windows Firewall allowed on a specific IP address.
Reporting on Windows Firewall Logs
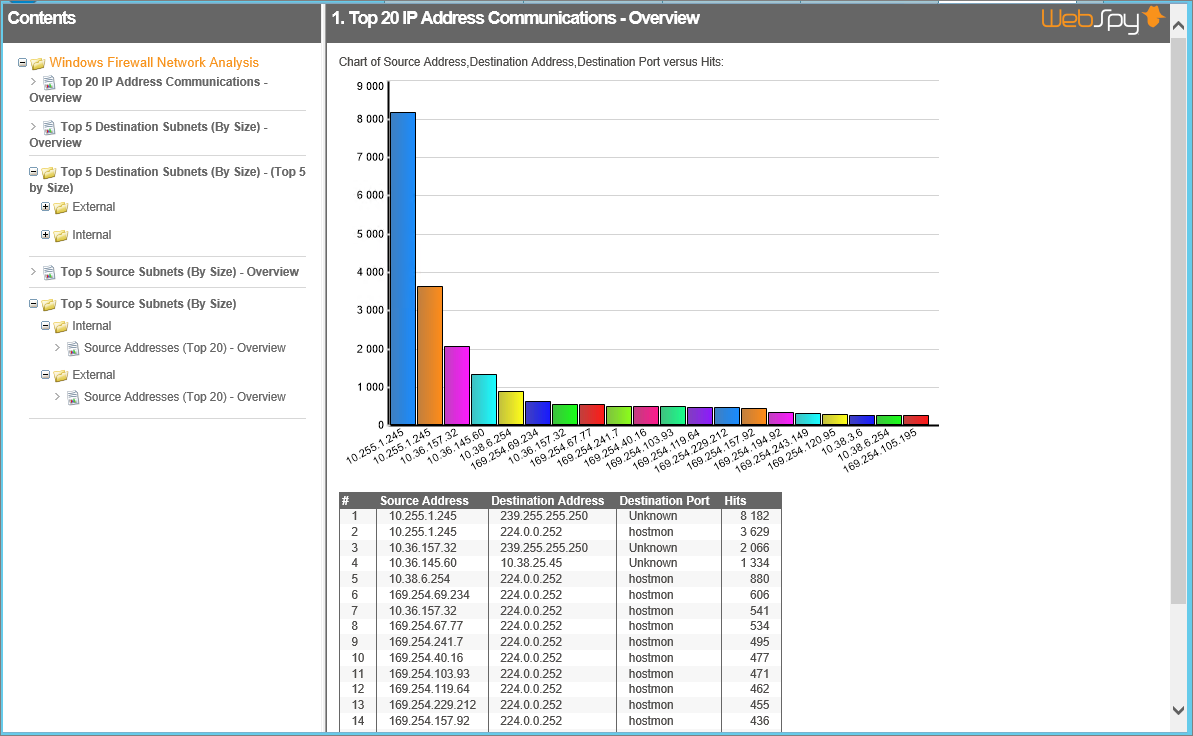
You can also create report templates to extract information into a single document such as the most active devices or the most blocked traffic. You can filter, graph and table the information to your own designs and specification.
Analyzing Multiple Windows Firewall Logs
What makes Windows Firewall great is that you literally have them everywhere, so you can use them to listen to the network and tell you what is happening. In the same way a botnet works, the collective is far more powerful than the sum of its members.
Webspy Vantage is able to import logs from multiple machines and combine them into a single storage. Alternatively, you can import them into discreet/separate storages. You can then generate an analysis or report on one or more storages.
Having this collective view of your network is very powerful, and it enables you to mine useful information by combining the fragments of the larger network traffic picture.
If all of this sounds like a lot of effort, don’t worry, you can automate all of the tasks and receive daily, weekly or monthly reports by email, showing what is happening on individual machines, and across your network.
Conclusion
WebSpy Vantage allows you to consolidate your Windows Firewall logs, enabling central monitoring and reporting across your network. By adding the missing reporting component, you bring Windows Firewall in line with some of the other vendor’s desktop firewall products.
Depending on the compliance you are trying to achieve for your environment, you would now be able to prove that you have a managed firewall strategy that is actively protecting your desktops.


