
WebSense Reporting just got better! If you’re using WebSense Web Security Gateway 7.7 or above, you can now import your WebSense log files into WebSpy Vantage and enjoy its extensive Report Templating, Aliasing and scheduling features to get the right report to the right person.
Here’s how!
Configure WebSense’s SIEM Integration Options
- Open your WebSense management interface and go to Settings | General | SIEM Integration
- Select Enable SIEM integration for this Policy Server.
- Enter the IP address or hostname of the machine hosting your syslog server (see below), and set the port to 514.
- Select UDP as the transport protocol
- Select syslog/key-value pairs (Splunk and others) as the SIEM Format
- Click OK to cache your changes. Click Save and Deploy to save the changes.
Install a Syslog Server
WebSpy Vantage does not collect syslog messages directly, but it will import the text files created by most Syslog Servers when they receive syslog messages from WebSense. Here are some good syslog products:
- Kiwi Syslog by SolarWinds
- Syslog Watcher by SNMP Soft
- Free Syslog Server by Whats Up Gold
Configure your Syslog Server to create text logs in a folder accessible to WebSpy Vantage and leave it to generate some log data. Before too long, you should have a text log files containing records that look like:
06/17/2013 11:23 AM,Debug,fe80::4910:b814:ccdf:11ac%23,vendor=Websense product=Security product_version=7.7.0 action=permitted severity=1 category=1525 user=LDAP://192.168.0.50 OU=MyDepartment,DC=MyDomain,DC=com/Glew\, Scott src_host=192.168.0.5 src_port=0 dst_host=s.youtube.com dst_ip=74.125.227.135 dst_port=80 bytes_out=0 bytes_in=0 http_response=0 http_method=- http_content_type=- http_user_agent=- http_proxy_status_code=0 reason=- disposition=1026 policy=- role=0 duration=0 url=http://www.youtube.com/watch?v=_S58f8rKmjk
It is a good idea to install your Syslog Server on the same server as WebSpy Vantage. That way you can create the logs on a local drive, and import them into WebSpy Vantage from a local drive.
Import the Syslog Text Files into WebSpy Vantage
Before proceeding, ensure you are running WebSpy Vantage version 2.2.0.105 or above (Tools | Check for updates).
- Open WebSpy Vantage and go to the Storages tab
- Click Import Logs.
- Give your Storage a name and click Next
- Click Local or Networked Files and Folders and click Next
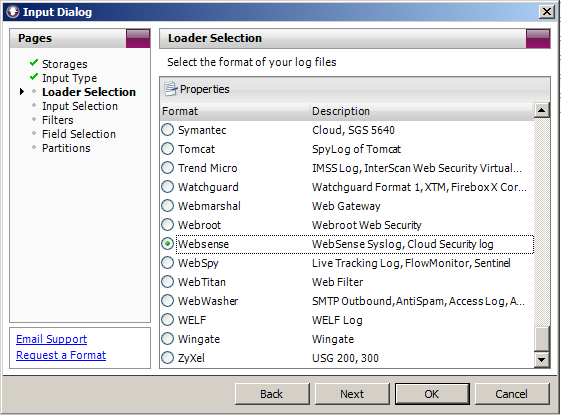
- Select WebSense as the Loader format and click Next

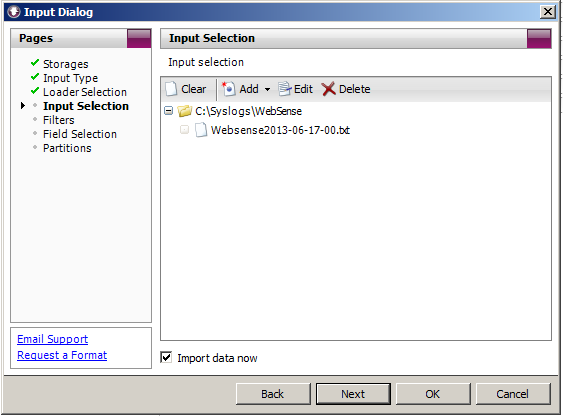
- Click Add | Folder and add the folder containing your Syslog text files. Click OK.

- Click OK on the Import Wizard to start importing your WebSense Syslog files.

Automate the Import process
Now that you have a new storage importing WebSense Syslog files from your log folder, it is a good idea to automatically import new syslog files each day.
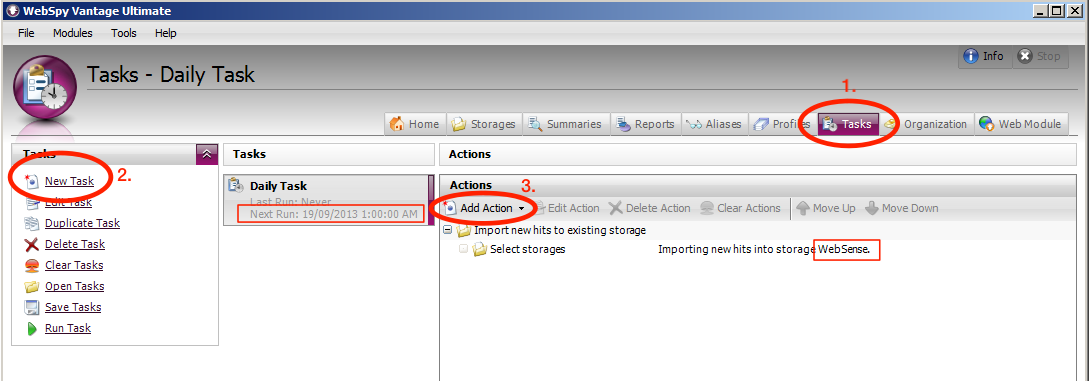
- Head to the Tasks tab and create a new Daily Task set to run at 1am each day.
- Once the Task has been added, click Add Action and add the Import new hits into existing storage.
- Select your new WebSense storage and hit OK.
Analyze and Report!
Now that you’ve setup the log import process, lets analyze!
- Head to the Summaries Tab
- Click New Analysis
- Select your WebSense Storage and ensure the WebSense Syslog Schema is selected. Click Next.
- Ensure Ad-hoc Analysis is selected and click OK.
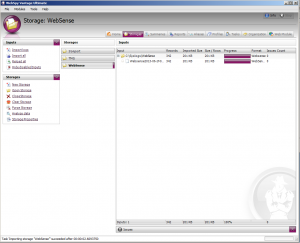
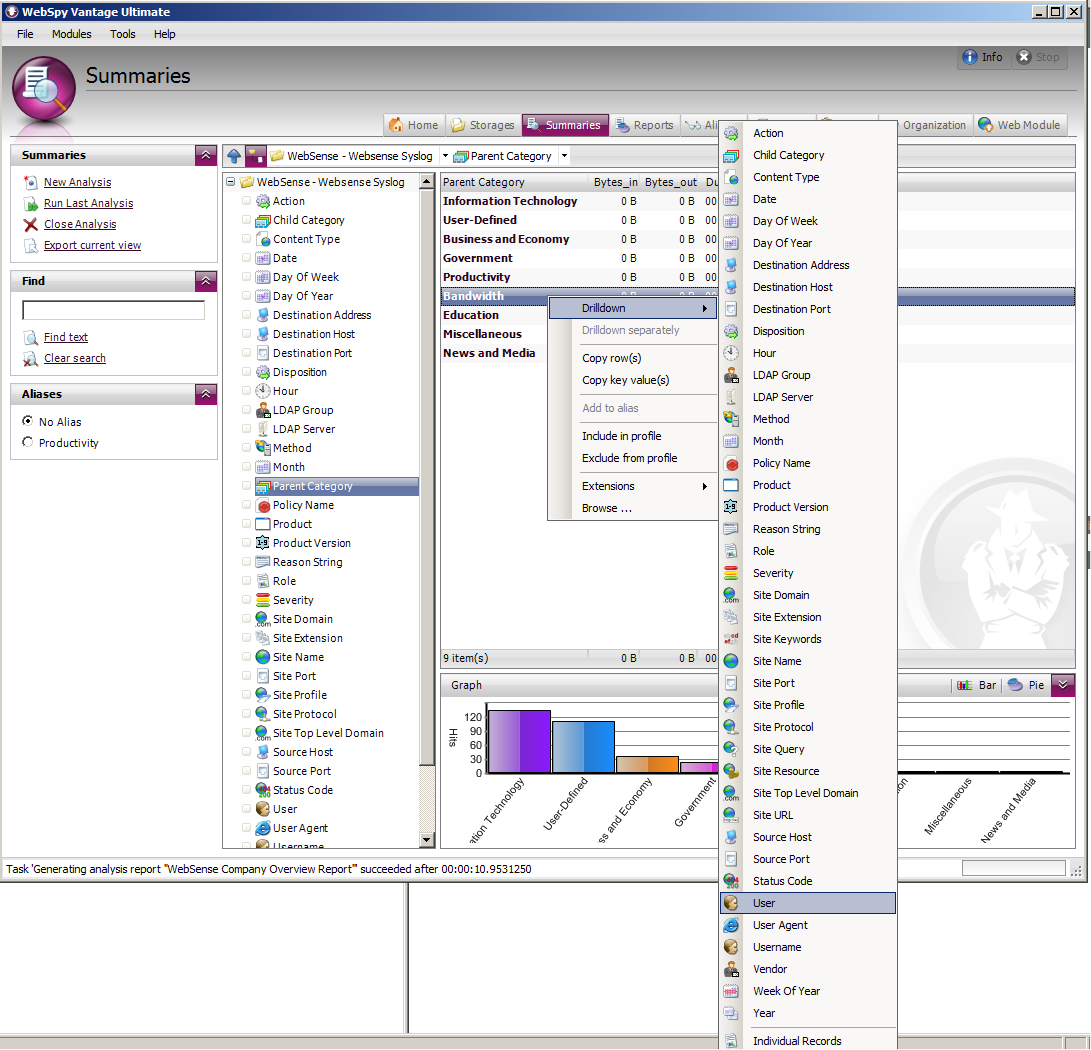
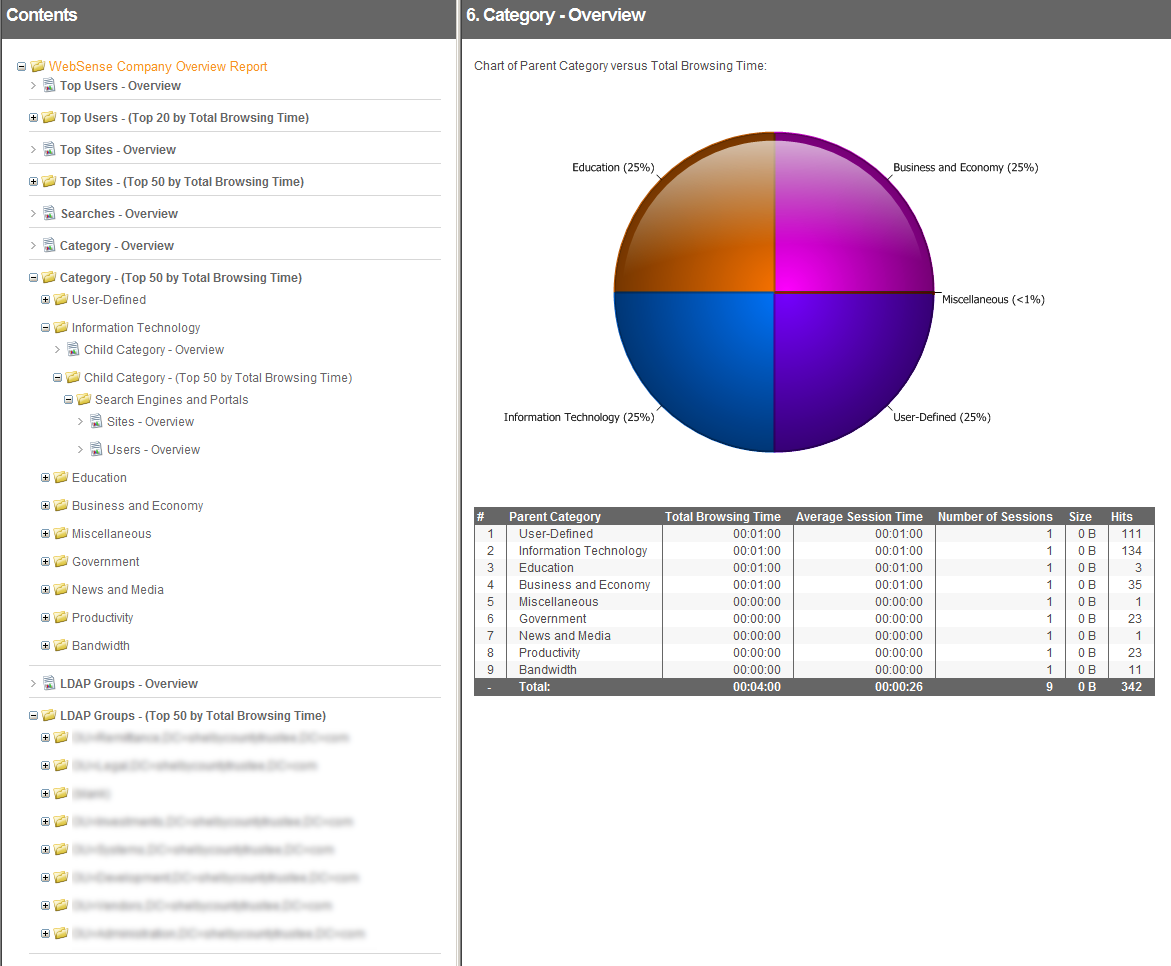
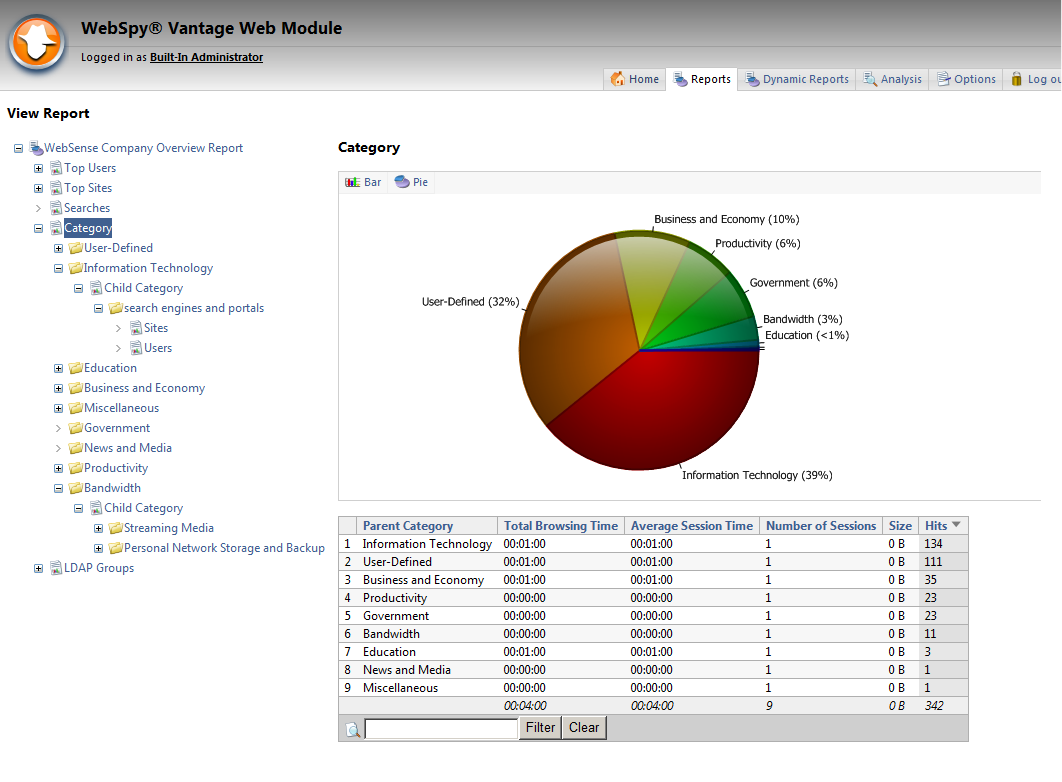
Click through the Summaries on the left to see all the information WebSpy Vantage has imported from your logs. For example select the Parent Category summary to see the Web Categories that your organization is browsing. Each of these ‘Summaries’ can be used when building Report Templates as well as in filters.
Create a Report Template
Now that you have an understanding of what WebSpy Vantage can show you by clicking on the various summaries in the Analysis tab, you can start building a report template to report on the information you need (or download our sample report template below).
- Head to the Reports tab and click New Template
- Name the Report My WebSense Report, select the WebSense Syslog schema, ensure Analysis Report is selected and click OK
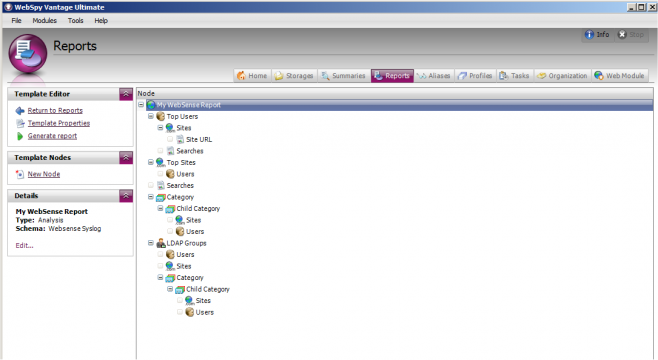
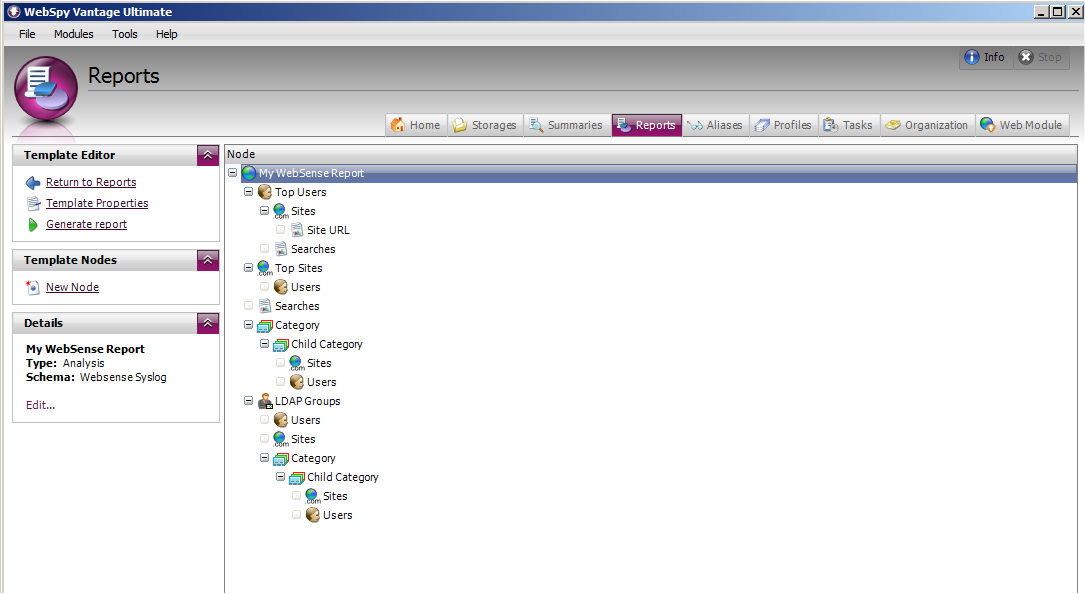
- Now you have a blank report template, you can start populating it with Nodes to define the information you’d like to select from your WebSense Storage. Right-click the My WebSense Report node and click New Node.
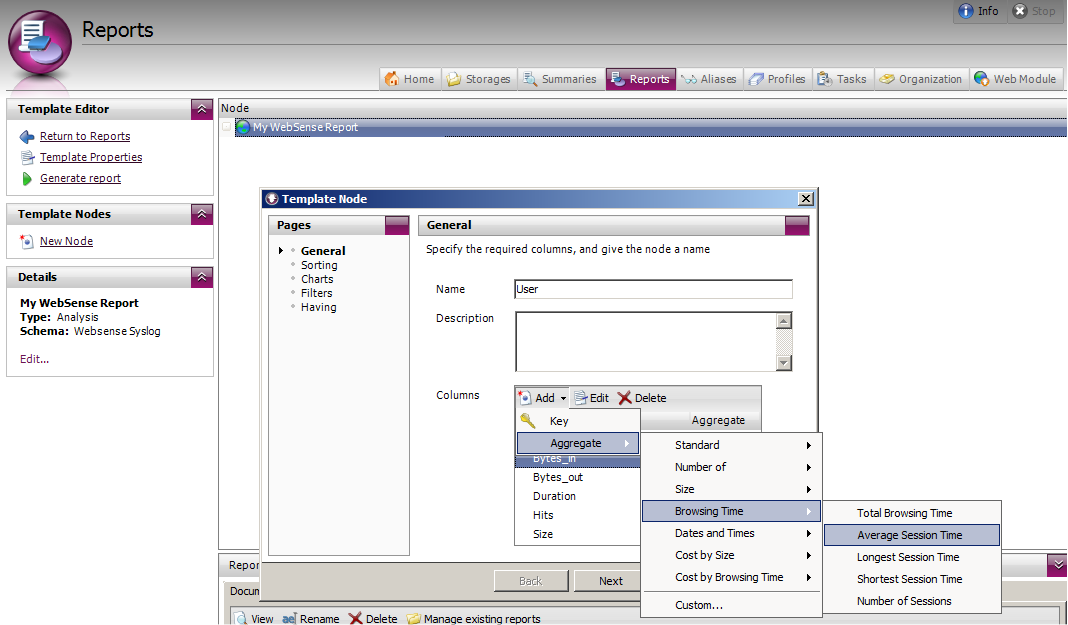
- Select the User Summary and click Advanced
- In the Columns section, add the Total Browsing Time, Average Browsing Time and Number of Sessions Aggregate columns:
- Click Add | Aggregate | Browsing Time | Total Browsing Time.
- Click Add | Aggregate | Browsing Time | Average Browsing Time.
- Click Add | Aggregate | Browsing Time | Number of Sessions

- Click Next.
- Sort by Total Browsing Time and select the Descending radio option.
- Click OK to add the node.
- Add more Nodes to your report template selecting different summaries each time, such as Site Domain, Parent or Child Category, and LDAP Groups. Tip: You can right-click Copy/Paste existing nodes.
.
Download a WebSense Syslog Report Template
To get started, download this WebSense Report Template that displays activity for your top users, sites, categories and LDAP Groups. Extract the zip file, then open the Template file on the Reports tab in WebSpy Vantage.
Run your Report
Now that you have defined a report template, select your report and click Run Report. Proceed through the Report Wizard making sure you select your WebSense storage and your desired report format. You may also want to add a filter on the Filters tab to select specific dates, users or LDAP groups to report on. But for the first report, leave the filters section blank.
Keep Going!
We’ve only just scratched the surface of what you can do with WebSpy Vantage. Try adding a Run Comparison or Analysis Report action to your daily task to email a new report to you each day, create some Aliases for your users or LDAP Groups, and share reports with the right person via the Web Module.
Check out our Demo Videos to learn more about using WebSpy Vantage to achieve your reporting goals!
If you need assistance, don’t hesitate to get in touch with us at support.webspy.com.