Security and Threat Management solutions, such as Microsoft Forefront TMG, IronPort and Blue Coat, use predefined URL categorization to simplify blocking and filtering management. Different security vendors have different ways of categorizing websites but it generally involves referring to a gigantic, regularly updated database of millions of websites sorted into 50-100 relevant categories.
Majority of security vendors will give you a high level overview of the categories, such as Sports, Shopping, Online Community, Streaming Media, Employment and Gambling, but rarely provides intuitive ways to further investigate the traffic going to the sites within these categories. The nifty thing about WebSpy’s solutions is that, as long as categories are logged, you can use WebSpy to analyze web browsing in relation to these categories and get a much clearer overview of your organization’s web usage.
Classify Productive & Unproductive Categories
Assessing productivity in relation to predefined categories is what I would like to focus on today. I have imported and run an analysis on TMG logs using WebSpy Vantage. As previously mentioned, you can import logs from any security device we support – if the information is in the log file WebSpy can report on it.
TMG logs contain information whether traffic has been ‘Allowed’, ‘Denied’ or ‘Failed’. Using WebSpy Vantage you can easily drill down further into this information. For example, let’s say I’m interested in having a look what categories have been allowed, i.e. not blocked, I simple expand the ‘Allowed’ node and click ‘URL category’.
Allowed Categories - Click to Enlarge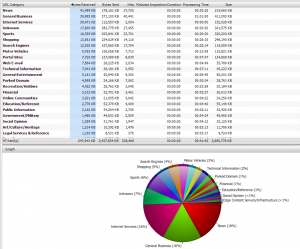
This information is great but it doesn’t tell us anything about productivity. WebSpy Vantage not only provides this assessment for your entire organization, specific department and individual users, but also gives you the ability to customize the categories that are deemed productive as this can vary wildly depending on the industry and organization.
How?
You use WebSpy’s Aliases feature to sort categories in relation to your organization’s view of their productiveness. Our software comes with a default list of aliases so you can either edit these or set up new aliases. I’ll take you through the process of setting up an Alias from scratch.
1. Creating a New Alias
- Click on the Alias tab and select ‘New Alias’ in the top left corner
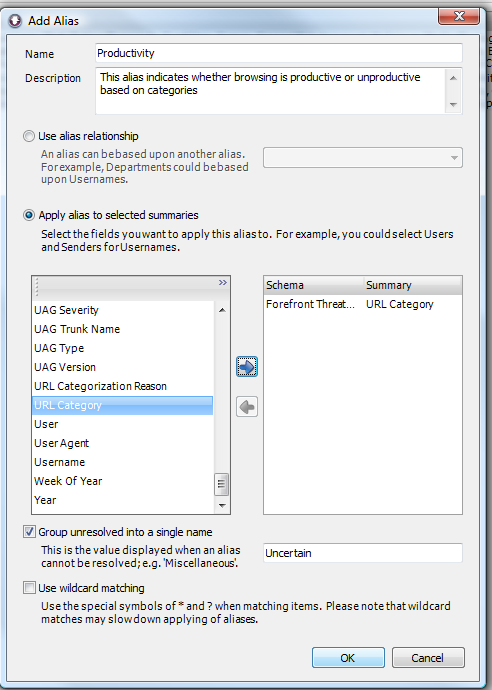
- Name your Alias something appropriate and provide a short description. I’ll name mine ‘Productivity’.
- Make sure ‘Apply alias to selected summaries’ option is checked
- Click ‘Schema’ to specify the log file type and scroll down to the bottom of the list to locate and select ‘URL Category’.
- Tick the ‘Group unresolved into a single name’ box and name it something appropriate. Let’s go with ‘Uncertain’.
2. Add Alias Groups
Once an alias has been added, you need to add alias groups. You can have as many alias groups as you want but for this purpose it makes sense to have only two, ‘Productive’ and ‘Unproductive’. There might be certain categories, such as ‘Education/Reference’ or ‘Blogs/Wiki’, that might be difficult to correctly deem as productive or unproductive and you’d rather not specify. If this is the case you don’t need to add an alias group as it will automatically be created for any category that hasn’t been grouped under the other alias groups. Remember how we ticket ‘Group unresolved into a single name’ and called it ‘Uncertain’ before.
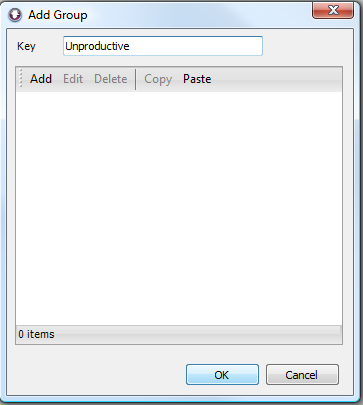
- Click the Add Group button in the Groups task pad.
- Enter the desired alias group name (Productive) in the ‘Key’ edit box and click OK. Repeat steps for the ‘Unproductive’ group.
- At this stage you could also add items (categories) to your group but I’m going to show you another way of adding categories.
3. Add Categories to your ‘Productive’ and ‘Unproductive’ Alias Groups
This is where customization really works its charm. What is deemed as unproductive at one company might be completely legit and considered productive at another. For example, in a recruitment company one could assume it would perfectly normal for employees to visit other employment sites but this could be considered personal and unproductive at a hospital or real estate agent.
There’s a few different ways of adding items to an Alias group. While still in the Alias screen you can click ‘Refresh Unassigned’ in the top right part of your screen. Because you haven’t assigned anything yet all categories will be displayed. From here you can simply highlight the category group, for example ‘Unproductive’ and Ctrl + click all categories you want to place in that group. Once you’ve selected your categories right click and select ‘Add to selected group’. Repeat the process to add categories to your ‘Productive’ group.
Alternatively, you can go back to the ‘URL Category’ listings in the ‘Summaries’ tab and Ctrl + click selected categories, right click and select ‘Add to alias’, select your ‘Productivity’ alias from the drop down menu and select the ‘Productive’ or ‘Unproductive’ group.
4. Assess Productivity
With aliases, groups and items set up you’re ready to assess productive and unproductive browsing. In the ‘Summaries’ screen, left hand side under ‘Aliases’, simple select your ‘Productivity’ alias and the URL categories will be sorted in accordance with your view of their productiveness.
Productive vs Unproductive Browsing - Click to Enlarge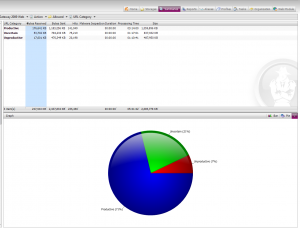
You can also investigate further by, for example, drilling down to determine what unproductive categories are most popular, what are the most popular unproductive websites within those categories, what hours during the day majority of unproductive sites are accessed (you might have a policy that allows personal web browsing during lunch hours), and of course who spends the most time on unproductive websites within your organization.
Top Unproductive Websites - Click to Enlarge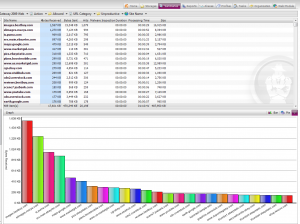


Leave A Comment